Project · lanyards
The cobra knot lanyard
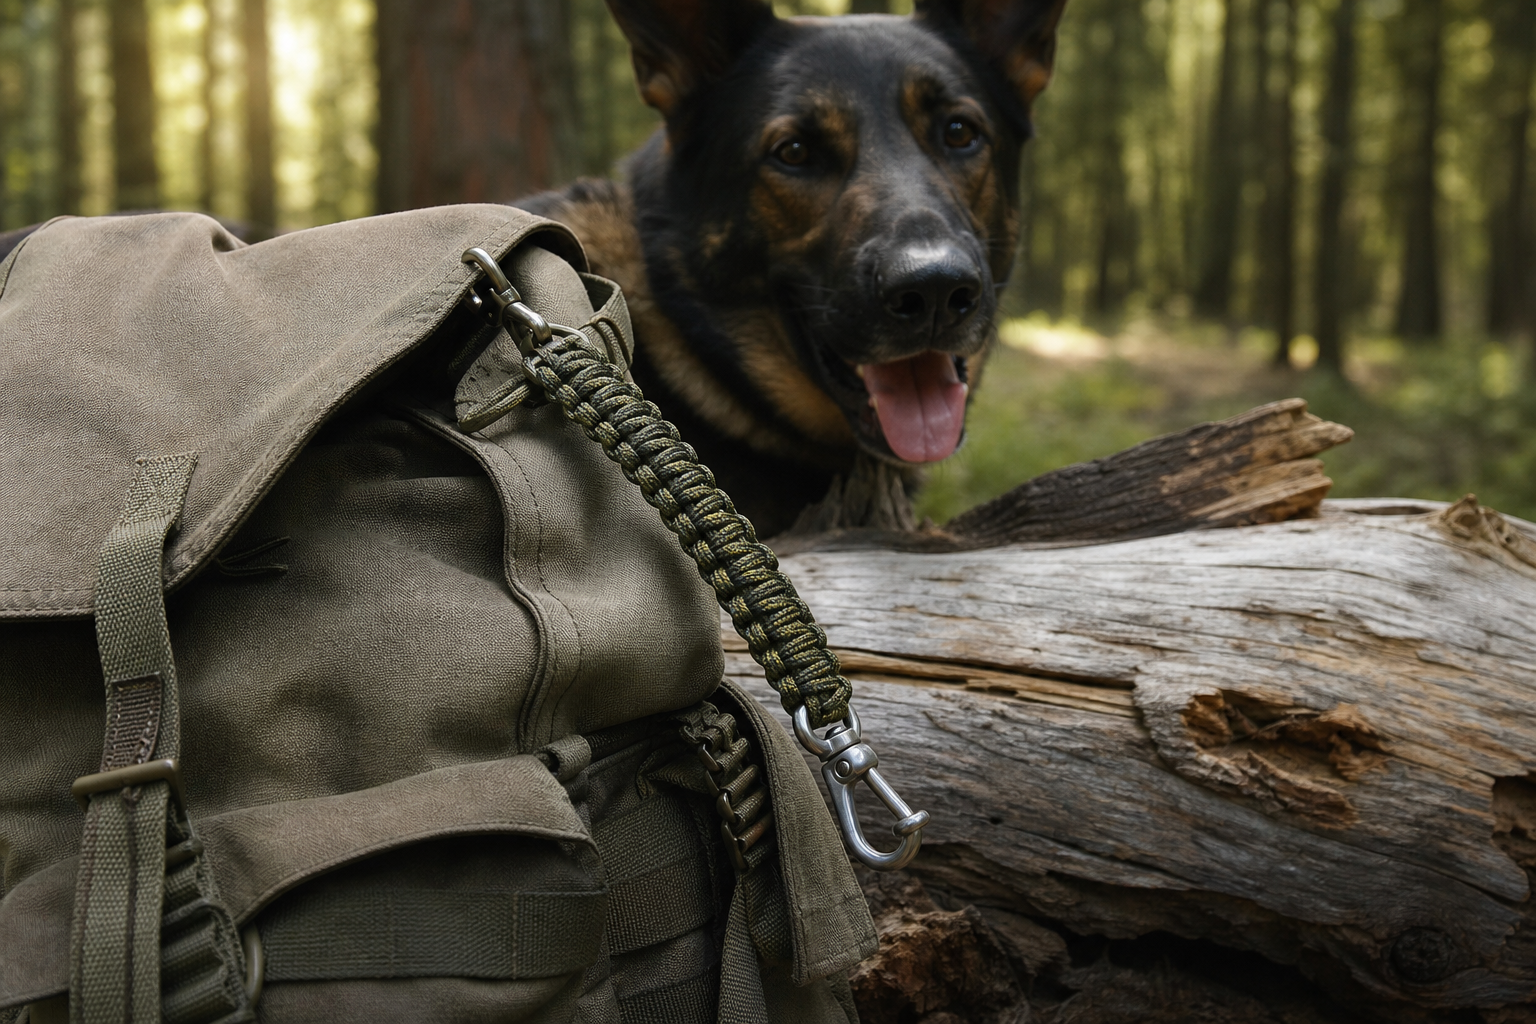
A lanyard is the most hardworking paracord object per gram: a woven spine with a clip at one end and a loop at the other, keeping a knife, light, whistle or multitool exactly where your hand reaches. The cobra stitch (the same weave as the cobra bracelet) makes a lanyard that is stiff enough to hold shape, cushioned enough to grip, and carries a metre of emergency cord for free.
Design decisions first
- Length: neck lanyards run 45–55 cm woven; gear lanyards (knife, light) 12–20 cm. Measure from clip to where your thumb rests in carry position.
- Clip: a steel gate clip for detachment, a fixed loop for permanence, the hardware chapter of the buyer's guide covers options.
- Cord: one colour for a working lanyard; two for the office-friendly version. About 2 m for a 40 cm spine.
- Termination: a lanyard (diamond) knot: this project is its natural habitat.
The build, step by step
Anchor the loop
Find the cord's centre and thread it through the clip's gate hole, pulling a bight through to form the fixed loop; 4–6 cm. If the clip hole is narrow, melt-splice a thin pull-cord through first rather than forcing (technique in joining).
Start the cobra spine
The two cord halves hanging from the loop are your core; the loop itself is the anchor. Tie the first cobra knot around the two core cords exactly as in the bracelet tutorial: left over the front, right behind, through, snug. The knot should sit hard against the clip.
Weave the spine
Alternate left-right half-knots down the core, tensioning each row equally, the spine should end up stiff enough to hold a gentle curve when you flex it. Straight for neck carry; on gear lanyards a few extra-tight rows at the far end stiffen the whip. Length decided in the design phase, minus 3 cm for the terminal knot.
Terminate with the lanyard knot
At the far end, gather the two cords and tie the lanyard knot: three interlocking loops, dressed symmetrical, tightened around nothing (it becomes the loop) or around the tool's attachment point. The diamond knot is the traditional lanyard terminal for a reason: it is rigid, handsome, and holds its loop open.
Finish
Cut the working ends to 5 mm past the diamond, melt and press into the knot's base. For a tool that will swing, add a second diamond 2 cm below the first: between the two knots, the attachment loop cannot slip.
Field note: a lanyard lives or dies at its two ends. Re-check the clip-side knots after the first week of carry: nylon beds in slightly and the first row of cobra can loosen a millimetre. One firm re-tension with pliers (the same move that finishes a monkey fist) and it holds for years.
What hangs well
Folding knives with lanyard holes, headlamps and backup lights, whistles on PFDs, multitools on packs, compasses on shoulder straps, dog bags dispensers on the harness, anywhere the rule is "reachable without looking, losable never." For pocket use, a shorter spine with a box knot chain instead of cobra keeps bulk down. And when the lanyard finally wears through after years of service, it unwraps into two metres of good cord, the quiet redundancy argument again, in miniature.
Care is minimal: rinse mud out with water, let it dry off the gear it hangs from, and re-check the two termination knots seasonally. A lanyard that has been swimming in saltwater gets a fresh-water rinse like everything else nylon on the boat: the primer on nylon's habits explains why. When the clip's gate finally stops springing shut, replace the clip, not the lanyard: unpick the last three cobra rows, re-mount, re-weave: a repair that takes ten minutes and outlives the original.
A cobra knot lanyard is sized for the object it carries, so the same weave that holds a knife on a belt can hold a racquet bag on a shoulder. The cord length, the clip and the loop change with the load, and the page on a lanyard for the bag covers that ground alongside notes on tennis around Nimes and the Gard, including courts and ranking. Read it after this one if you want the same stitch applied to a different kind of carry, with the lengths and the local detail stated plainly.