Knot guide · technique
How to join two paracord strands
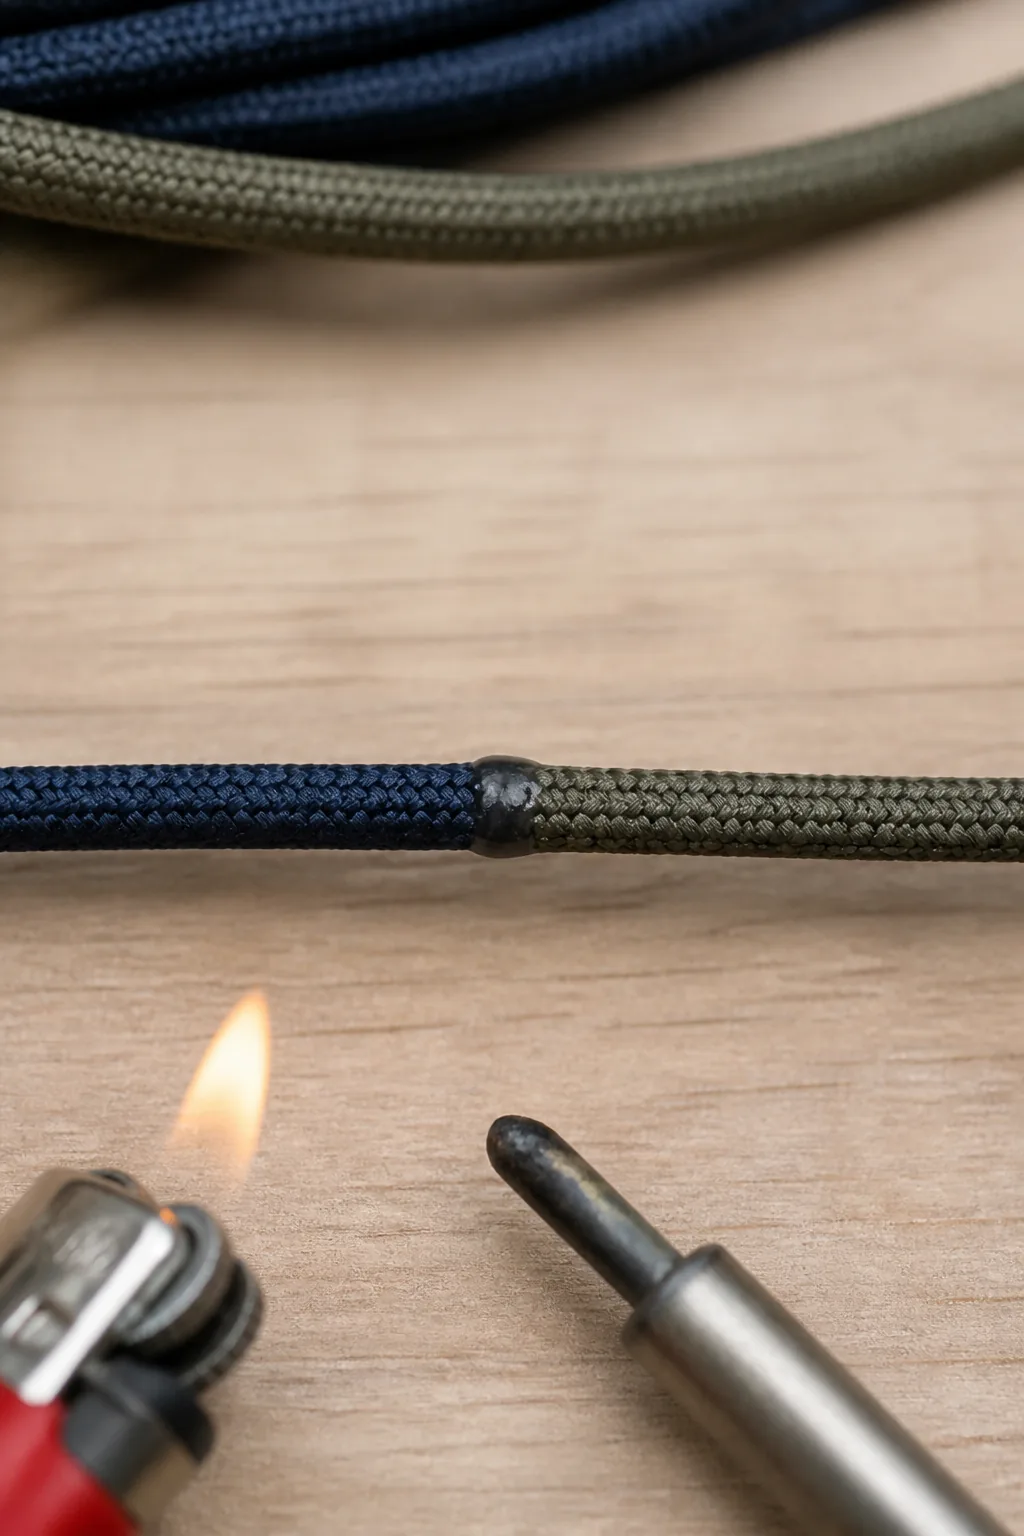
Every paracord maker hits the same wall: the colour change, the too-short offcut, the mid-project extension. Joining cord is a core skill with exactly three good answers, a melted splice for permanent, hidden joins, and two bends for joins you may want to undo. Choose by mission, not by habit.
The melt splice (permanent)
Cut clean
Freshly cut ends melt cleaner than frayed ones. Trim both cords square with sharp scissors, see the tool list in our buyer's guide.
Melt both faces
Hold a soft flame to each cut end until the nylon forms a glossy molten bead. Do not char it black: you want molten nylon, not carbon.
Press and roll
Touch the two molten beads together, then immediately roll the joint between thumb and forefinger (or press with a flat tool, the bead is hot enough to burn). A few seconds of rolling fuses the cores into a smooth bump.
Dress the joint
A well-made splice is barely thicker than the cord. If a hard ring remains, a few passes of fine sandpaper or a careful re-melt smooths it enough to pass through a buckle or weave.
Two-colour trick: pull the sheath of one colour back, gut 1 cm of core, and melt the core of the other cord into it before splicing sheath to sheath; the colour change runs inside the weave with no visible lump. This is how clean two-colour cobra bracelets change colour mid-row.
The double fisherman's bend (strong, permanent-ish)
When the join must hold serious load and heat is not an option, around food, in a tent, mid-hike, tie a double fisherman's: two double overhand knots, each tied around the other cord, pulled together. The result is the standard bend of climbing rope: compact, secure, and famously difficult to untie after heavy loading. It is the right join for prusik loops and ridgeline extensions where a field deployment will load it repeatedly.
The Alaska hitch (quick, field, retrievable)
For temporary joins (extending a guyline, making a longer measuring line) the sheet-bend family does the job and shakes apart afterwards. Pass one cord through a bight of the other as if starting a square knot, take one extra turn, and load gently. It holds surprisingly well in nylon-on-nylon and releases with a pull of the tail. Keep a real bend for anything that will swing a load over your sleeping bag.
Which join, when
| Join | Strength | Profile | Use it for |
|---|---|---|---|
| Melt splice | ~90% of cord | near-invisible | colour changes, permanent extensions |
| Double fisherman's | excellent | compact lump | prusik loops, loaded loops |
| Alaska / sheet bend | moderate | bulky, quick | temporary field joins |
Safety note: work ventilated, and never inhale nylon fumes: melt, don't burn. A splice done over a candle rather than a lighter gives a softer, more controllable bead. And test every join: 30 seconds of steady pull before it enters a project saves a bracelet unravelled at the worst moment.
Testing and care of joins
Every join earns trust the same way: steady pull, then shock, then inspection. Load the joined cord with your body weight hung well above the ground, then give it two or three sharp tugs to simulate the snatch of a real load. A melt splice that survives shock loading without a crack is permanent; a bend that has not slipped a millimetre is trustworthy. Inspect the weave entry and exit points, where failure always begins; the strands just before and after any join carry the stress concentration for the whole assembly.
In projects, place joins where they hide and work least: at the buckle end of a bracelet, in the buried core of a cobra weave's first row, inside the sphere of a monkey fist. Never place one inside a prusik's wrapping zone or at a lanyard knot's crown, where the extra diameter fouls the mechanics. And when you gut a splice during an unravelling, note why it held: the autopsy of a good join is a free lesson in how nylon fails. Photograph them while they are still open: makers who keep a build log of their splices end up wanting it printed, and a French comparatif de livres photo is a sane place to start once the log outgrows the phone.
A melted splice hides well in a bracelet or a lanyard, but the same logic of matching two ends shows up away from the workbench. Anglers face it every trip: a tippet to a leader, a dropper to a seam, a knot that has to hold under load and still pass through a guide. The page on joining two lines at Paracord Central, part of its trout river feature on seams, rigs and Georgia rules, treats that overlap directly. Read it after the splice section if you want the same three-answer thinking applied to water rather than cord.