Project · for dogs
How to make a paracord dog collar
A paracord dog collar is the project that converts sceptics. Woven from Type III 550, a collar outlasts nylon webbing (the weave absorbs the chewing a flat strap cannot), washes clean in a sink, dries in an hour, and holds its colour for years. The trade is time: this is an evening's work, not thirty minutes, and the sizing must be right before the first knot.
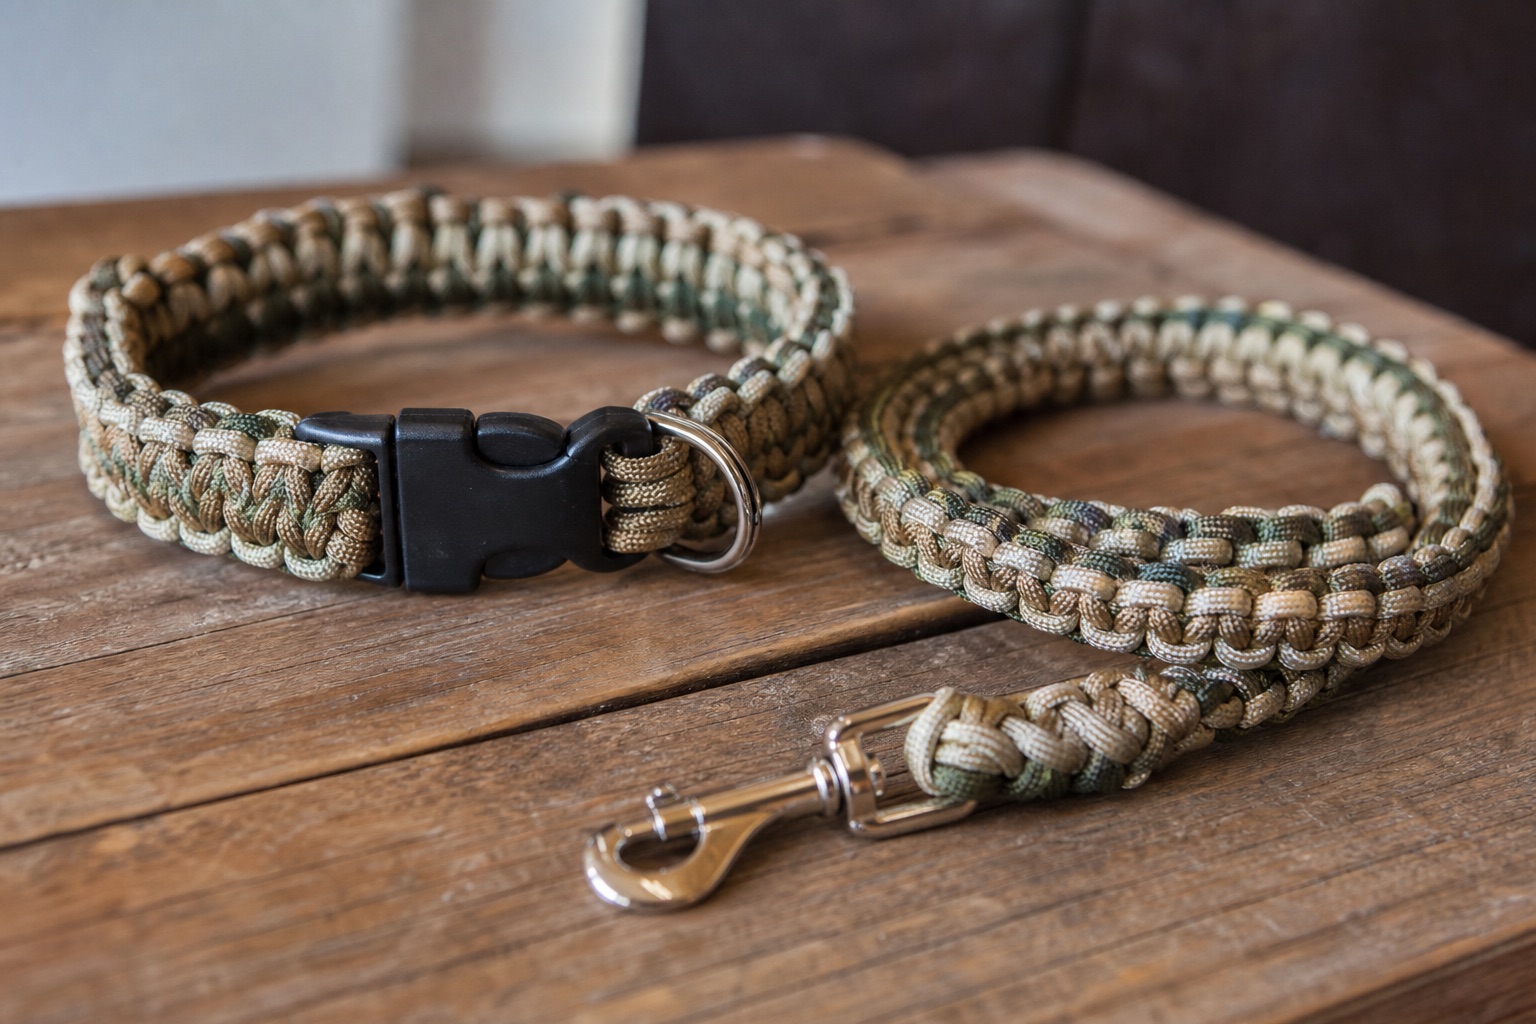
Hardware first, this is the safety-critical part
- Buckle: a metal side-release buckle rated for webbing, or a two-half buckle with a metal triglide. Plastic craft buckles are for bracelets; a dog's lunge load is another universe. Our buckle guide covers the closure families.
- D-ring: welded steel, wide enough for your leash clip, positioned at the top of the neck loop.
- Triglide: optional but wise, it takes the adjustment load off the weave.
Sizing
Measure the dog's neck where the collar sits, add 5 cm, two fingers must slide under the finished collar, snug enough not to slip over the head on a narrow-skulled dog, loose enough to breathe and swallow. Cord math: neck circumference × 10 in cm for a two-pass wide collar; 4–5 m for a medium dog. When in doubt cut long; offcuts become keychains or get spliced into the next project.
The build, step by step
Build the wide core
The collar's strength comes from its core, not just the weave. Run two or three lengths of cord through the buckle halves (perimeter set to neck + 5 cm), and lay the D-ring onto the top run. Some makers add a length of flat webbing inside for stiffness: the paracord weave then behaves like upholstery over structure.
Weave the first cobra pass
Cobra stitch over the core exactly as in the bracelet tutorial, but with firmer tension: this weave will be pulled by a leash. Alternate half-knots the whole circumference. At the D-ring, weave one knot through the ring's base so it is captured by the weave, not just resting under it.
Second pass = king cobra width
Turn the work and weave a second cobra pass back over the first. The collar becomes wide, dense and stiff (the comfortable shape for a dog's neck) and doubles the cord carried. Keep the rows square; on a curved run (the D-ring area), ease the tension slightly so the collar keeps its arc.
The welding trick
Melt the cut ends as usual: then, for the ends that exit near the buckle, also melt a small groove across the weave with the hot knife and press the tail into it. The nylon welds into the surrounding stitches. This is what keeps a dog collar from working its tails out over months of scratching and swimming.
Honesty note: a paracord collar is excellent everyday wear, but for a strong dog on a long line or any training setup involving serious force, use a harness or a rated collar: the collar here is identification-plus-light-lead wear. And check the D-ring stitching monthly; nylon tells you before it fails, but only if you look.
Care and repair
Mud: rinse, lather with dish soap, rinse, towel, hang. Odour: same, plus an hour of sun. Chewed spot: unpick to the damage, re-weave the section, one advantage of knot-over-core construction is that damage stays local. Fading: honest nylon holds dye for years; see the fibre notes in the types guide for why "nylon blend" collars fade in a season.
Beyond the collar
The same wrapped-core construction scales into leashes (add a woven handle loop), harness patches and matching human bracelets: the classic owner-and-dog set. For small dogs, a single cobra pass in Type II keeps the collar proportionate; for the giant breeds, Type IV or battle cord and doubled hardware. One dog, one evening, one collar that outlives the puppy phase it was tied in.
A paracord dog collar takes the same wear as any other gear that stays on an animal: dirt, water, and repeated tugging. The webbing and the knot hold up, but the soft parts around them, a padded liner or a favorite toy the dog carries, need their own routine. Paracord Central covers that side of ownership in its guide to washing and repair at home, which walks through choosing soft items, cleaning them without breaking down the fabric, mending small tears, and storing them so they last. Read it alongside the collar build if you want the whole kit to survive a season.
A collar that survives a season of chewing raises a fair question about the rest of the gear: why some textiles hold up and others pill, fade or thin out after a few washes. The same fibre logic applies to a leash, a harness or a jacket. A short page on fibres and how they wear covers how everyday clothes are built, why fewer pieces last longer, and how to care for them so the fabric keeps its structure. Read it alongside the collar instructions if you want the material reasoning behind the weave.