Project · bracelets
How to make a cobra paracord bracelet
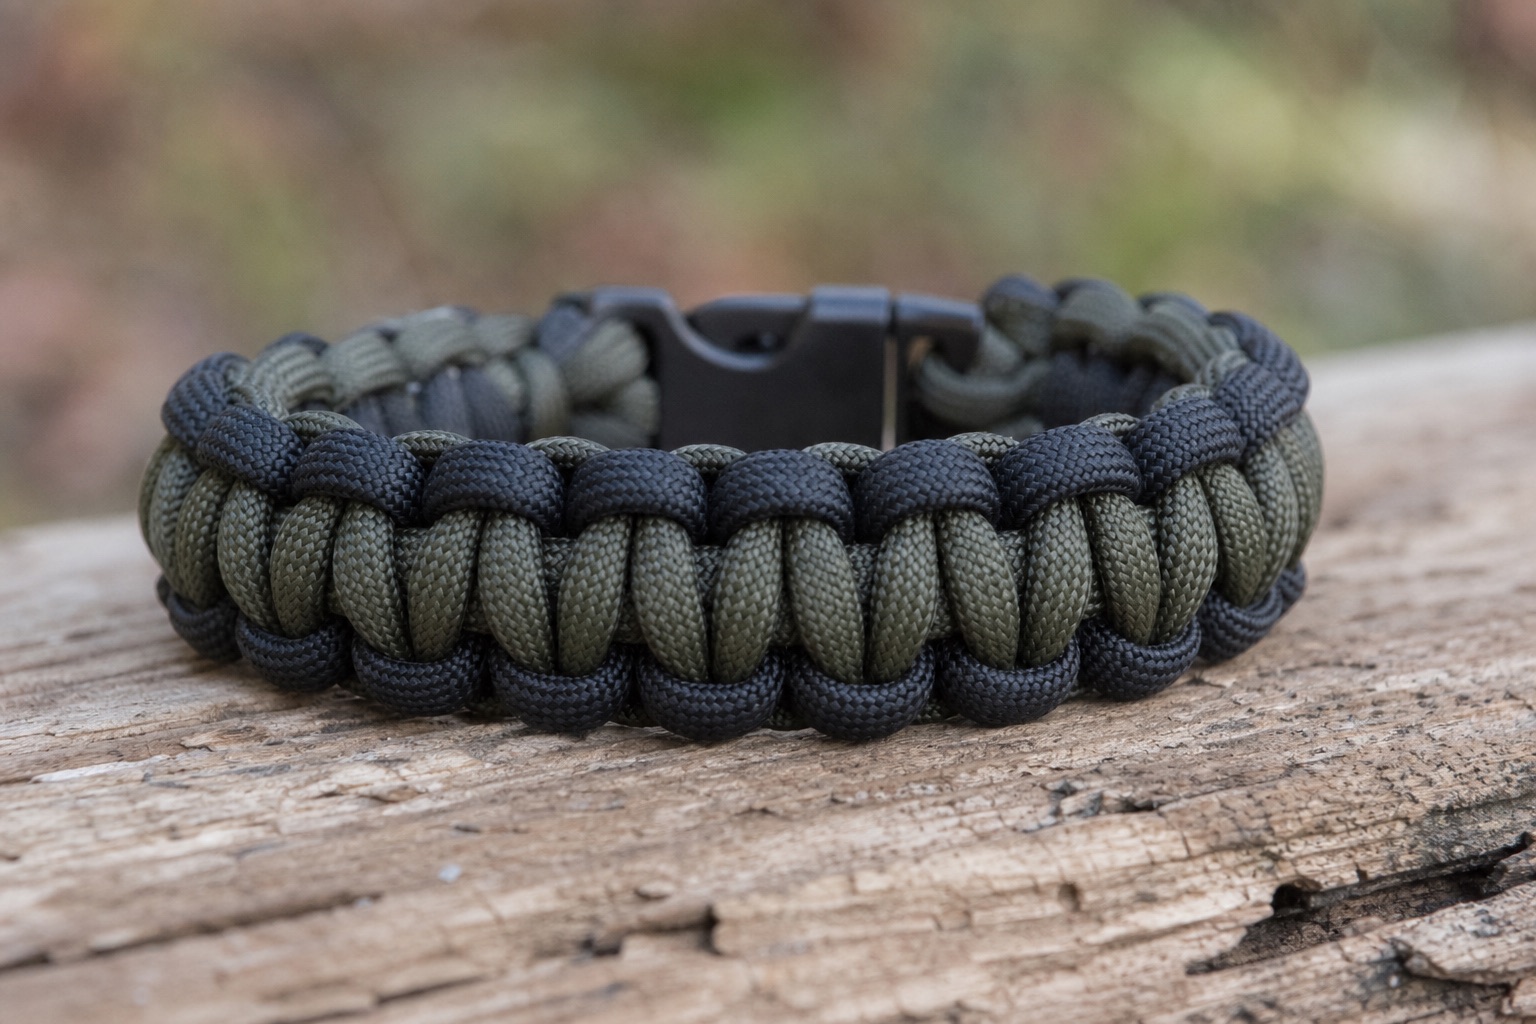
The cobra bracelet is the gateway project of paracord craft, and, done properly, a piece of gear you will wear for years. One weave, two hours, about four metres of Type III 550 cord, and a buckle. This tutorial covers sizing, setup, every knot with a diagram, and the finishing that separates a handmade bracelet from a factory one.
Materials and sizing
You need: one length of 550 cord, a side-release buckle (3/4" suits most wrists: the buckle guide compares styles), scissors, a lighter, and something to anchor the work. Cord math: wrist circumference in cm, plus 3–4 cm of ease, times 9 gives cord length in cm: roughly 3.5–4.5 m for an adult bracelet. Cut long; you can trim, never un-cut. If your colour run is short, join two lengths before you start.
Wrist measurement: wrap a cord around your wrist, pinch the crossing point, lay it on a ruler. Add 2 cm for a snug fit, 3–4 cm for a loose one. The finished weave does not stretch, the fitting happens now.
The weave, step by step
Set the core
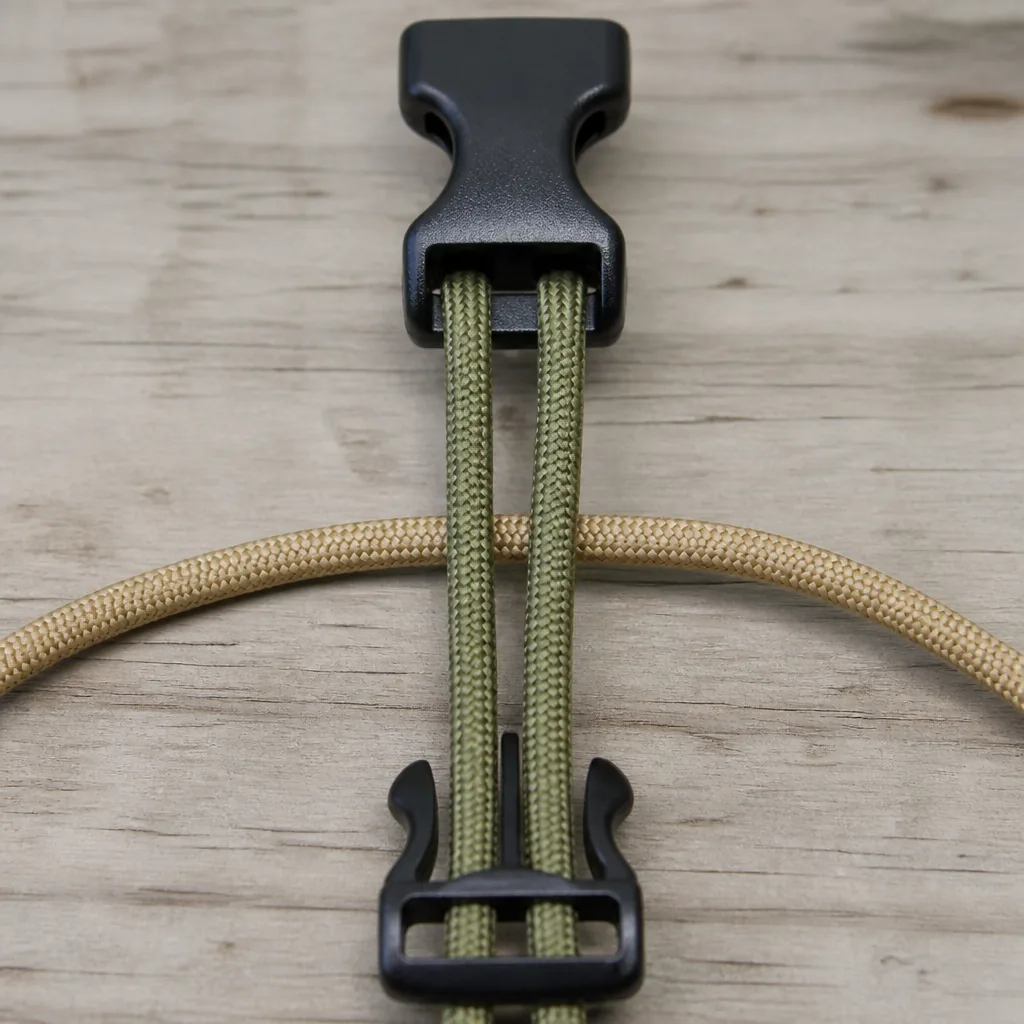
Thread the cord through one buckle half, fold it, and pass both ends through the second buckle half. This doubled cord is your core, the bracelet's spine. Set the buckle-to-buckle length to wrist + ease, then anchor one buckle end to your jig, table edge or toe.
First half-knot: left end to the front
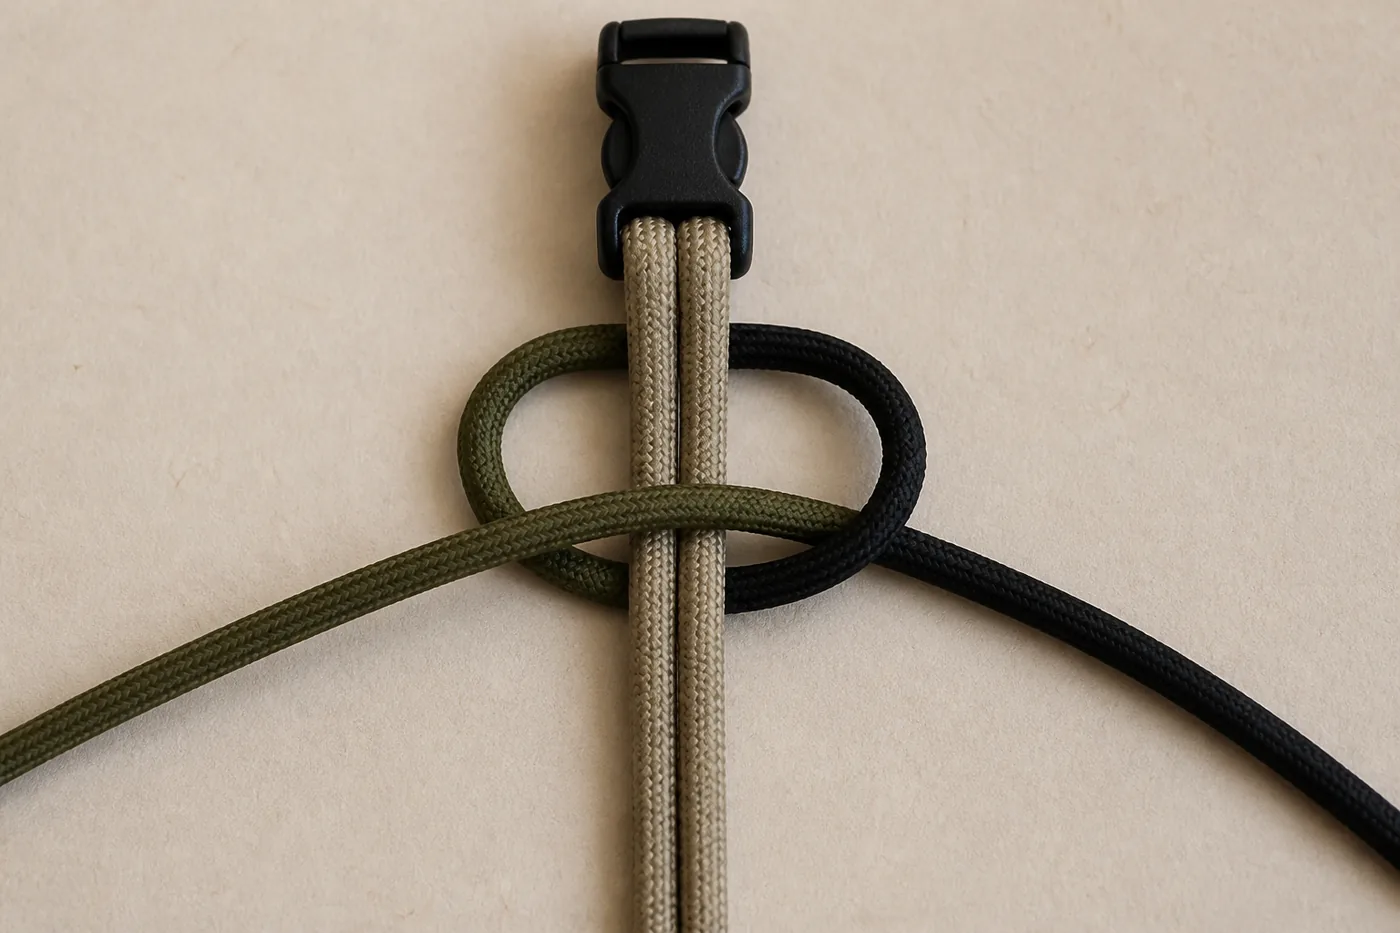
Lay the left working end across the front of both core cords, pointing right. Pass the right end behind the core, up through the loop the left end formed on the left side, then over the left strand and down through the right loop. Both ends now point outward again. Snug the knot up to the buckle: equal tension on both ends.
Second half-knot: mirror it
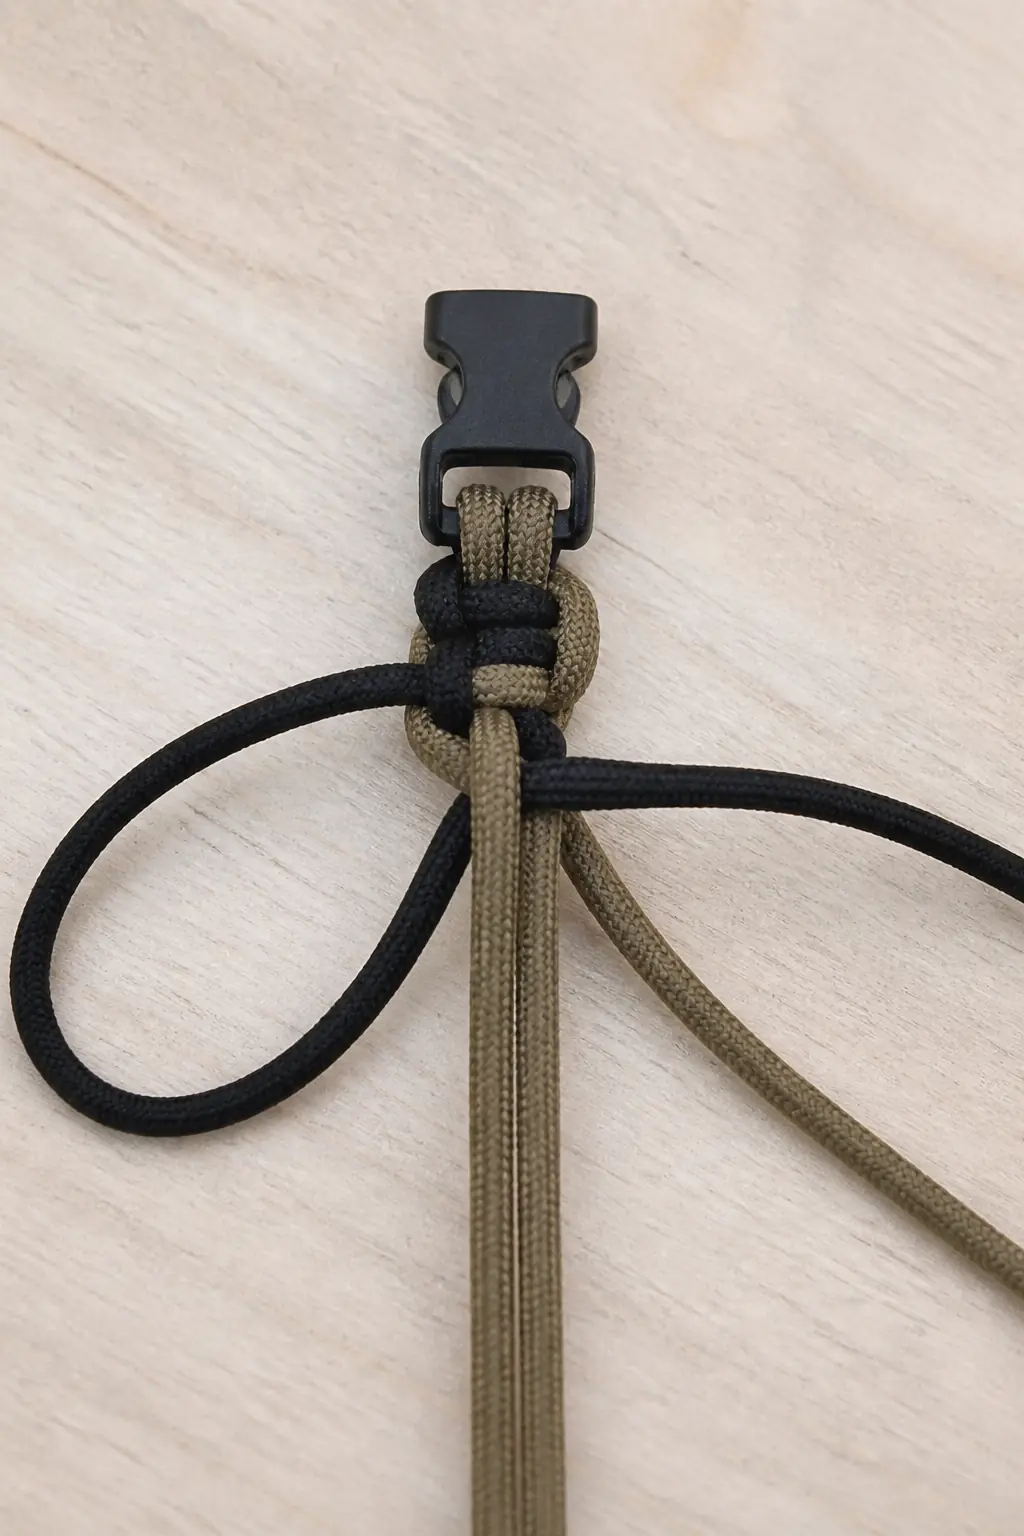
The next knot starts from the right: right end across the front, left end behind, through, over and down. This alternation (left, right, left, right) is what builds the cobra's raised, symmetrical spine. Forget to alternate and the bracelet twists into a spiral (a "boa": a feature if you want it, a mistake if you don't).
Repeat to the buckle
Keep alternating, one knot at a time, pushing each row snug against the last. After every two or three rows, check the spine stays centred and the width stays even. Stop when the weave reaches the far buckle with 3–4 mm to spare: the final row will take up the gap when tightened.
Finish the ends
Turn the bracelet over. Pull each working end to find where it exits the last knot, cut 4–5 mm from the weave, melt the cut end, and press the molten bead into the weave with a flat tool from the back side only, this keeps the front face clean. Trim any stray filament flush once cool.
Tension is the whole skill. Nine out of ten first bracelets fail on tension, not pattern: rows loose at one end, tight at the other, weave wandering off-centre. The habit: after every knot, pull both ends firmly and equally, and square the row with your thumb before the next. Watch the edge lines of the weave, they should run parallel like rails.
Variations once the basic cobra works
- Two-colour, join cords at the midpoint with the hidden melt splice and alternate colours every knot or every row.
- King cobra: weave a second cobra pass back over the first: thicker, heavier, carries twice the cord. The first step towards belts.
- Reversed cobra; flip the bracelet and weave the second pass on the flat side for a smooth dress-face.
- Tracer, a thin contrasting cord laid inside the weave appears as a bright line down the spine.
Wearing it as gear
A cobra bracelet is also 3–4 m of emergency cordage worn on the wrist, the reasoning behind the whole survival bracelet idea. When you need it, unbuckle, pick the last knot loose with a fid or needle, and the weave unzips in under a minute. If that deployment scenario is your main reason for wearing one, consider the fishtail weave (it unravels even faster) and a shackle closure you can open with cold fingers.
The same four metres of Type III 550 cord that hold a cobra weave together also turn up in smaller jobs around the house, and the habits transfer: measure twice, melt the ends, keep the knot tight. Readers who finish the bracelet and want another use for the leftover length, or who simply want a first craft project that involves cord and a needle, will find the soft toy care page useful. It covers choosing a toy, washing it without wrecking the seams, repairing a split, and storing it so the stuffing stays dry. The cord skills are the same; the material is softer.